| ||||||||||||||||||||||
The Battle of Kaleb VI was a battle of the Galactic Civil War fought in 5 ABY between the New Republic and the Galactic Empire, over the important crossroads planet of Kaleb VI, also home to recently discovered massive ionite deposits. It was one of the most important tactical, strategical, and influential Republic victories of the war.
Prelude[]

The New Republic fleet gathering for the attack on Kaleb VI
The planet Kaleb VI was an important crossroads planet inside the Inner Rim, located near both the Hydian Way and the Corellian Run. It had long been valued by both the Alliance and the New Republic, but due to the large Imperial blockade and garrison, was bypassed during the initial Republic advance. However, in 5 ABY, the New Republic, desperately in need of supplies, the council made the desicion to take the planet, rich in natural resources, before it was too late. The New Republic Sixth Battle Group, led by Admiral John Taggart on the Endeavour, along with small elements of the Sixth and Fourth Fleets comprised of mostly transports carrying ground troops, were dispatched.
The Battle[]
Space battle[]
By the time the fleet exited hyperspace and arrived at Kaleb VI, the Empire, having previously been informed of the imminent attack, staged a trap to capture and crush the Rebellion by surrounding the Alliance Fleet between the Imperial Sector Fleet and the Death Star II. The Imperial fleet opened fire, quickly shattering the Rebels' offensive perimeter, with numerous ships being lost.

TIE fighters, TIE interceptors, and TIE advanced being deployed by the Imperial fleet.
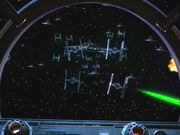
TIE fighters and TIE interceptors were deployed from the Imperial Fleet to engage the Rebel fighters and capital ships. Some of the smaller warships were destroyed by the TIEs, and the Rebel and Imperial fleets engaged from a distance. Eventually, TIE bombers joined the fray, forcing the various squadrons to fight them before they reached the fleet.

The Death Star III firing it's superlaser
Captain Taggart ordered the remaining larger capital ships to direct all their fire on the Death Star, barraging it with proton torpedoes and turbolasers, while the smaller ones engaged the Star Destroyers. Although it was almost suicidal, Taggart's tactic resulted in the destruction of six Star Destroyers and most of the Death Star's heavy defenses. Grand Moff Shoan Kilian, remembering his orders to destroy the planet if the shield was brought down, rotated the Death Star to face Kaleb VI and prepared to fire. However, heavy fire from the Endeavour rendered the superlaser almost completely inoperable, resulting in deaths of most of the superlaser crew when it fired; the superlaser missed the planet and hit one of it's moons instead.

X-Wings enter the trench
After the Capital ships had softened up the Death Star's defenses, Gold, Red, Rogue, and Bantha Squadrons, led by the Millenium Falcon, entered a trench on the unfinished superstructure, leading to an unguarded thermal exhaust port which lead directly into the main reactor. They manuevered down the trench, narrowly evading TIE fighters. As Red and Rouge Squadron engaged the TIEs, Gold Squadron began their attack run on the trench, covered by Bantha Squadron. They were followed by the Imperial Black Squadron. The TIE pilots shot down Golds 2, 3, 4, 7, 9, and 12 in the trench, then shot down Golds 5 and 6 as they attempted to escape. Gold Leader made it to the target area, only to miss the exhaust port.
The squadrons were forced to defend a Star Tours travel agency StarSpeeder 3000 after the civilian vessel's inexperienced droid pilot accidentally stumbled into the midst of the battle.

The explosion of the Death Star III
A second bombing run was made by Red Squadron and Bantha Squadron, while the Rouge Squadron remains of Gold Squadron attempted to hold off the fighters. When they reached the exhaust port, the starfighters barraged it with proton torpedoes.
The starfighters, the Republic capital ships, and the Star Tours ship withdrew from the battle, leaving the station to be destroyed.
